Amazon has recently introduced AWS Elastic Beanstalk. Here’s a quick walk-through on how to deploy your very first AWS Elastic Beanstalk web application using Eclipse.
I’m assuming you already have an existing AWS account. If you don’t, please create an AWS account before proceeding. Go to AWS Elastic Beanstalk and click on the “Begin Using AWS Elastic Beanstalk” button. Amazon will then make an automated call and give you a PIN over the phone. Enter this PIN in your browser to complete the sign up process.
Sample Application
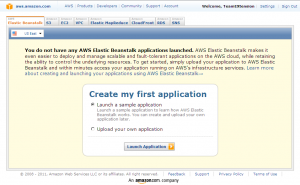
Next step is to go to your AWS Elastic Beanstalk console. The easiest way to see how Elastic Beanstalk works is by launching the sample application.
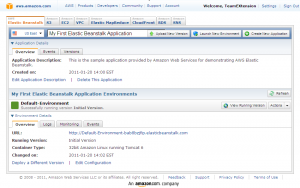
Wait a few minutes while the sample application gets deployed. You will then see your sample application in the console.
Going through the interface gives us the following information. The container type is a 32bit Amazon Linux running Tomcat 6. An EC2 instance has been launched, an Elastic Load Balancer created, and the EC2 instance added to an Auto Scaling Group. The EC2 instance is a t1.micro instance. The initial and maximum JVM heap size is set to 256Mb.
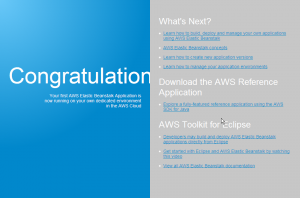
Click on “View Running Version” to see the actual web application.
Don’t forget to delete the sample application by clicking on “Delete This Application” link when you are done. You might also want to delete the S3 bucket created by this sample application. Go to the Amazon S3 tab, look for the newly created Elastic Beanstalk bucket, and delete.
Hello World
Now fire up Eclipse. We will deploy our own web application using Eclipse. You will need Java 1.5+ and Eclipse 3.5+. You will also need to install the latest version of AWS Toolkit for Eclipse. Make sure you include “Amazon Elastic Beanstalk” when you install the AWS Toolkit.
Once you have the latest AWS Toolkit installed, it’s time to create an new project. Create a new “AWS Java Web Project”. If you don’t see this kind of project or if you only see “AWS Java Project”, you didn’t install the AWS Toolkit for Eclipse properly. Install AWS Toolkit again and make sure you include “Amazon Elastic Beanstalk”.
Now create a new “AWS Java Web Project” and type “Hello World” for the project name. Enter your AWS “Access Key ID” and “Secret Access Key”. You can get this information from your AWS Security Credentials page. Click Finish when done.
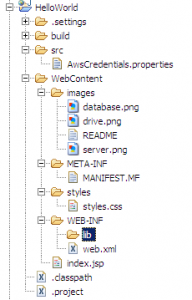
This new project will contain:
- src/AwsCredentials.properties – A properties file which stores your AWS credentials.
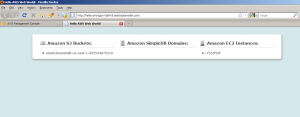
- WebContent/index.jsp – A sample JSP file that will loop through and display your current S3 Buckets, SimpleDB Domains, and EC2 Instances.
- WebContent/WEB-INF/web.xml – A bear bones web.xml.
- Other supporting files like CSS and PNG files.
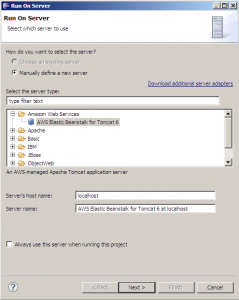
If you really want this project to be a simple Hello World web app, you can replace the generated index.jsp with “Hello World”. We will keep index.jsp as is. Now let’s deploy this new project. First we have to define the server in preparation for deployment. Right click on your project and select Run As -> Run on Server.
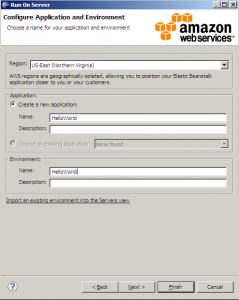
Click next, then enter “Hello World” for the application name and the environment name.
Click “Deploy with key pair” and click on the + button to create a new key pair. Enter “HelloWorld” for the key pair name and hit Ok.
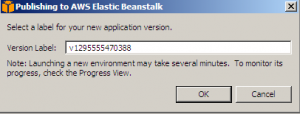
Click Finish. You will then be asked for a version label for this application. The fields is pre-populated so you can use the default.
Hit ok. The publishing of your application will start. Give the process a few minutes for it to configure your new server and upload the application. Once the application is deployed, Eclipse will open a browser where you can see your new application.
Reviewing the AWS Elastic Beanstalk console shows that the container type is a 64bit Amazon Linux running Tomcat 6 and the JVM heap by default has an initial and maximum value of 256Mb.
That’s it. We have created our first Elastic Beanstalk web application. Don’t forget to delete the Hello World application using the AWS console so you don’t keep getting charged for this instance. You can also delete the Hello World S3 Bucket, Key Pair and Security Group.

Great, this provided me a starting point to AWS. They should really have AWS for Dummies.
Thanks for the tutorial, I’ve found it useful and the images are on the right place.
Great job! 🙂